How to Apply Concrete Coating: A Step-by-Step DIY Guide

This is the most critical step in the entire process, because a poorly prepared surface will lead to a poor finish.
Cleaning and Repairing
First, thoroughly clean the concrete with a degreaser to remove any dirt, oil, or other contaminants. Scrub the surface with a stiff-bristle brush, and then rinse well with a garden hose or pressure washer. Allow the surface to dry completely before moving on to the next step. Next, fill any cracks or holes with a concrete patching compound. Follow the manufacturer's instructions for mixing and applying the patching compound. Once the compound has dried, sand down any high spots to create a smooth, even surface.
Etching the Concrete
Finally, etch the concrete to create a rough surface that will help the coating adhere better. If you're using a chemical etching solution, follow the manufacturer's instructions for mixing and applying the solution. Typically, you'll need to apply the solution to the concrete, let it sit for a specified amount of time, and then rinse it off thoroughly.
Step 2: Apply the Primer
Once the surface is clean and dry, it's time to apply the primer. The primer will help the epoxy coating bond to the concrete and will also help to fill in any small pores in the surface.
Mixing and Application
First, mix the primer according to the manufacturer's instructions. Make sure to mix thoroughly to ensure a proper chemical reaction. Next, use a roller or brush to apply the primer to the entire surface. Be sure to work in small sections to avoid the primer from drying too quickly. Finally, let the primer dry completely before moving on to the next step. The drying time will vary depending on the type of primer you're using, so be sure to check the manufacturer's instructions.
Step 3: Apply the Epoxy Coating
So, you've decided to tackle a concrete coating project yourself. It's a rewarding endeavor that can transform a drab, worn-out floor into a stunning and durable surface. But before you dive in, it's crucial to understand that applying a concrete coating is a multi-step process that requires careful preparation, the right tools, and a good deal of patience.
At GatorGuard, we believe in empowering our customers with knowledge. While we always recommend a professional installation for the best results, we understand that some homeowners prefer the DIY route. In this comprehensive guide, we'll walk you through the process of applying a concrete coating, from surface preparation to the final topcoat, and provide you with tips and tricks to help you achieve professional-quality results.
Essential Tools and Materials for Concrete Coating
Before you begin, make sure you have all the necessary tools and materials on hand.
Safety and Cleaning
- Safety Equipment: Safety should always be your top priority. Wear protective gloves, safety goggles, and a respirator mask when working with epoxy and other chemicals.
- Cleaning Supplies: You'll need a degreaser, a stiff-bristle brush, and a garden hose or pressure washer to thoroughly clean your concrete surface.
Repair and Preparation
- Repair Materials: If your concrete has cracks or holes, you'll need a concrete patching compound to repair the damage before applying the coating.
- Etching Solution: Etching the concrete creates a rough surface that will help the coating adhere better. You can use a chemical etching solution or a mechanical grinder for this step.
Coating System
- Primer: A high-quality primer is essential for ensuring proper adhesion of the epoxy coating.
- Epoxy Coating: Choose a high-quality epoxy coating system that is designed for your specific application. Explore ourepoxy floor coatings to see our options.
- Decorative Flakes (Optional): If you're using a full flake system, you'll need decorative vinyl flakes to create a textured, multi-colored finish.
- Topcoat: A clear topcoat is applied to protect the epoxy coating from UV rays and other environmental factors.
Step 1: Surface Preparation
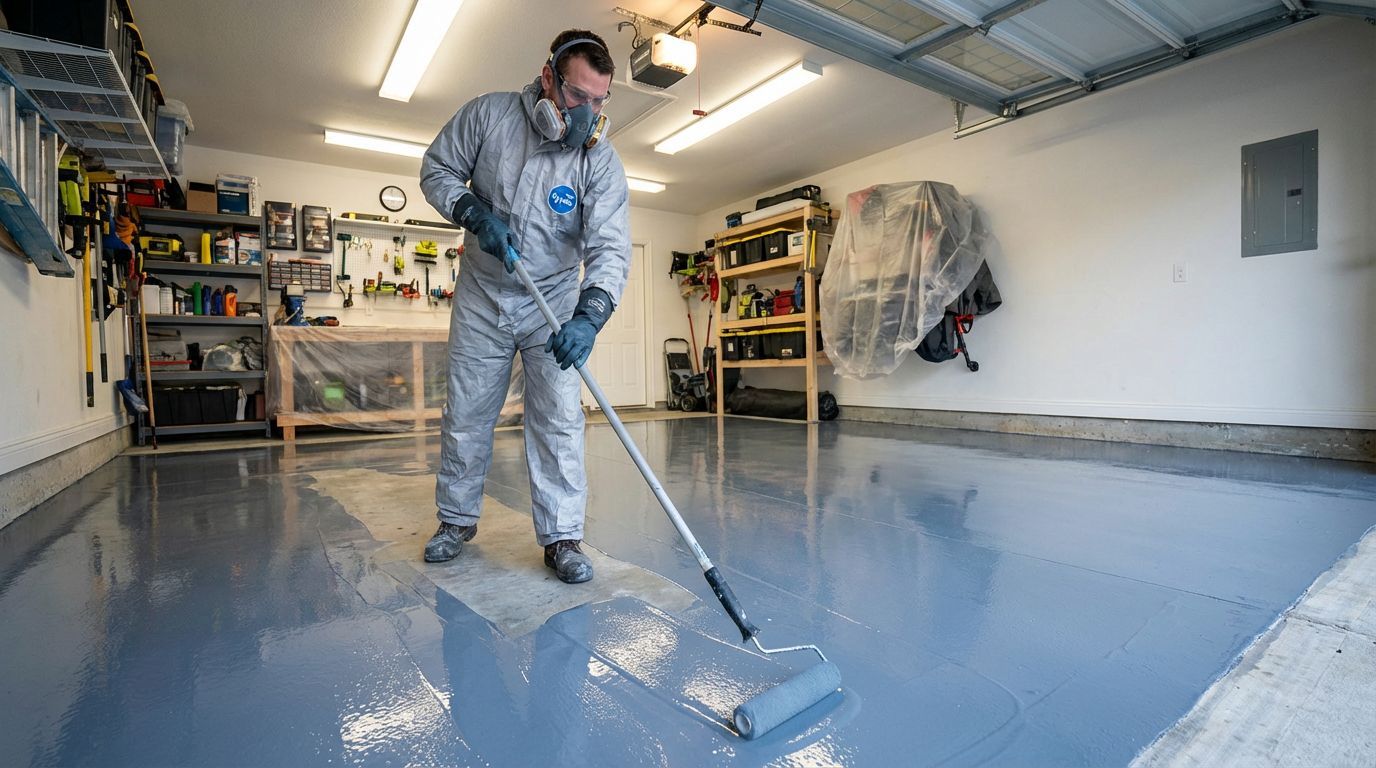
First, mix the epoxy resin and hardener according to the manufacturer's instructions. Be sure to mix thoroughly to ensure a proper chemical reaction. Next, use a roller to apply the first coat of epoxy to the surface. Work in small sections and be sure to spread the epoxy evenly. If you're using a full flake system, sprinkle the flakes over the wet epoxy while it's still tacky.
Step 4: Apply the Topcoat
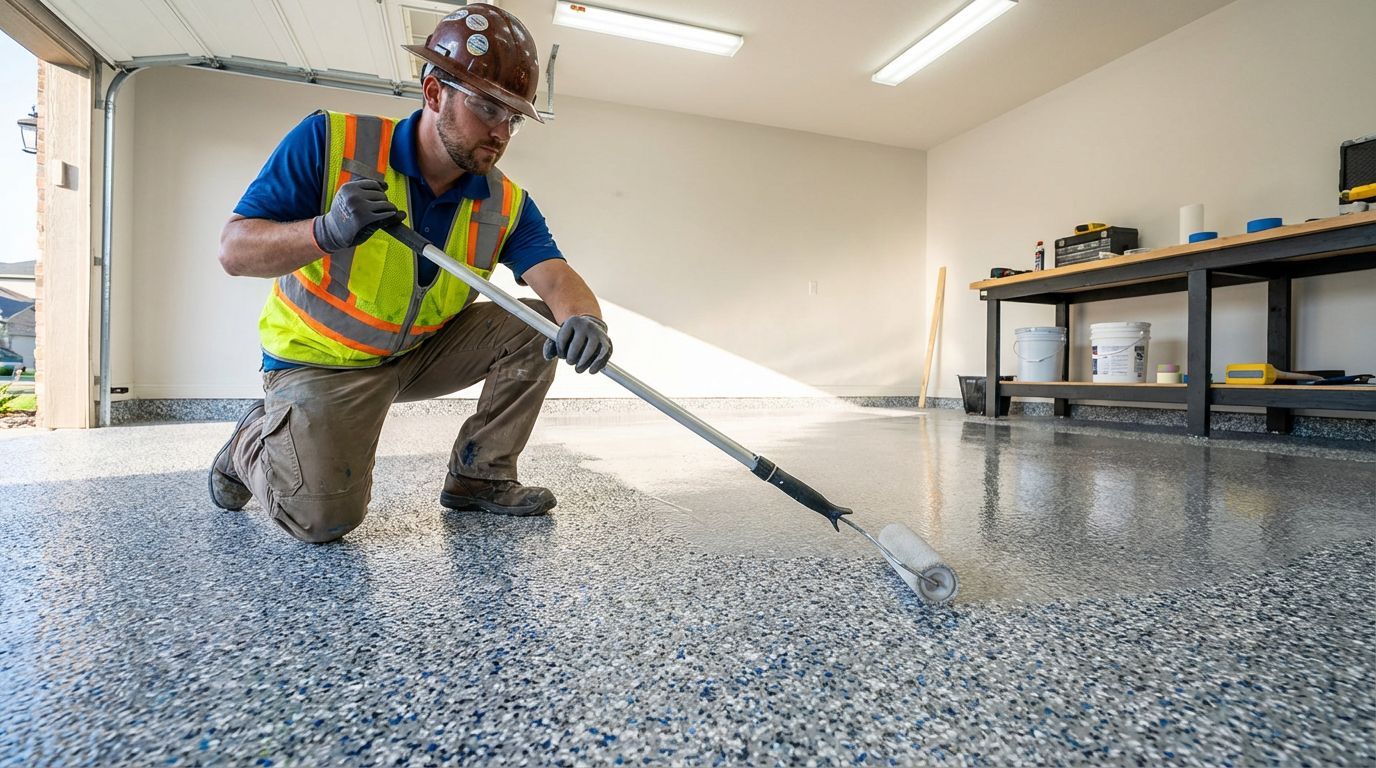
The final step is to apply a clear topcoat. This will protect the epoxy coating from UV rays and other environmental factors.
First, mix the topcoat according to the manufacturer's instructions. Next, use a roller to apply the topcoat to the entire surface. Finally, let the topcoat cure completely before walking on or using the floor. The curing time will vary depending on the type of topcoat you're using.
Read More
- Preparing Your Concrete Floor for Coating: A Step-by-Step Guide
- How Long Does Epoxy Coating Last? Lifespan & Durability
Common Mistakes to Avoid When Doing Concrete Coating
Even with the best intentions, it's easy to make mistakes when applying a concrete coating. Be sure to avoid skipping the surface preparation, not mixing the materials thoroughly, not working in small sections, or not wearing proper safety equipment.
Ready to Get Started?
While this guide provides a general overview of the process, it's important to remember that every concrete coating project is unique. If you're not comfortable with the DIY approach, or if you want to ensure the best possible results, we highly recommend hiring a professional installer.
At GatorGuard, we have a team of certified installers who can handle any
concrete coating project, from a small garage to a large commercial space. We use only the best materials and provide a lifetime warranty on all of our installations.